
2016 to 2018 were busy years.
In the beginning of 2017, Nancy returned full time to Seattle after working in South San Francisco for 2 years. Before her return, we managed to get in a few boat projects between round trips to/from SFO/SEA, but not as many as we wanted. There are always unfinished projects on a boat.
Here are a few projects that were completed–none worthy of a blog by themselves, but definitely improvements:
Gaco on the pilothouse roof
In the spring, we put Gaco (an elastomeric covering) on the pilothouse roof. It was quite a project. As long as we were going to seal the roof, it made sense to get rid of the mast support that was nonfunctional since we put a railing around the roof.
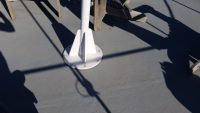
Old mast support on the pilothouse roof
That meant that we needed to seal the holes left from the bolts. The crane made it easy to move the 5 gallon bucket of Gaco sealer to the roof.
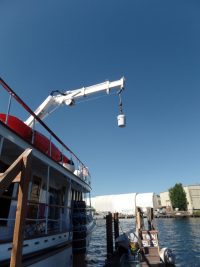
Using the crane to lift the Gaco sealer to the roof
We cleaned, sanded, caulked, primed, sealed, and put on three finishing coats. We love the final product. Much less slippery and much more durable and comfortable. Done!!!
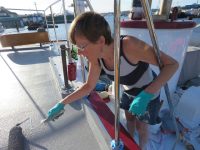
Nancy applies one of the finishing coats
Prevention of WBS (wet butt syndrome) via canvas covers for the crane seat and crane controls
We have wanted to cover the crane for several years. It’s a big piece of metal that is prone to rusting. In addition, water collects on the seat, and causes WBS for the operator (Peter). The first two parts of the crane covering project were small: to cover the seat and the controllers for the crane. Over the last several years, Nancy has become quite skilled in her canvas-working. These 2 projects were easy–and allowed Nancy to procrastinate on the big project of covering the crane with something that could be easily removed. During the making of the 2 smaller covers, she crawled around on the crane enough to figure out a plan for the big cover, which is her next project.

Canvas covers for the seat and controls
Watermaker removal, rust remediation and painting in engine room
Removing the old watermaker
When we bought the Gyrfalcon, there was a watermaker in place. It had not been run for several years, and was probably ten years old at that time. We haven’t really needed a watermaker, since our trips have been short, but we figure we will need one in the future when we are chartering. Beside, it will be a luxury not to have to worry about water. We had considered refurbishing the old watermaker, but old watermakers were notoriously finicky and it would have cost nearly as much to refurbish as to buy a new one. Also, watermakers have become more sophisticated and reliable in the intervening years, so we decided to purchase a new one when the time came that it was needed. We decided to remove the old watermaker while the boat was out of the water in PT.
Here are some photos of the watermaker, taken when we first bought the Gyrfalcon
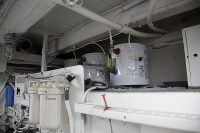
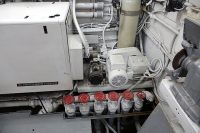
The main reason for this decision was that, if the through-hull was bad, it would allow us to repair the through-hull while the boat was out of the water. We needn’t have worried. The through-hull for the watermaker was the same as the through-hull for the Northern Lights generator. Still, as long as we were in PT, we went ahead with the project. There was water left in the system from the last time it was used (~10 years ago). The water stank of sulphur and unknown marine organisms.
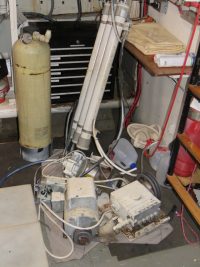
Pumps and reverse osmosis filters from the old water maker, after they were removed

Water filters from the old watermaker
The bay where the old watermaker was located had suffered some water damage over the years. Nancy restored it with penetrating epoxy and paint.
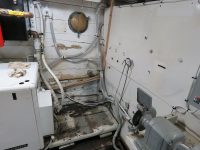
Watermaker location before restoration
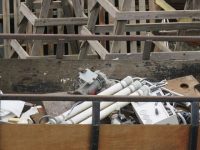
Final resting place
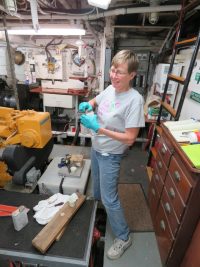
Nancy preparing to stabilize and paint the old watermaker location
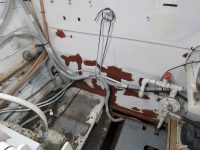
Watermaker bay sealed and rear fuel tank primed

Newly painted stbd aft fuel tank
For some time now, Nancy has been working on making the engine room look better. She has sanded and painted the rusted areas on the fuel tanks. As long as we were painting the watermaker bay, she decided to work on other items in the engine room.
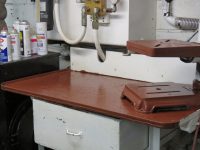
Drill press and work bench after priming

And completed. Now the drawer under the drill is begging for a fresh coat of paint.
The starboard forward fuel tank and the hardware cabinet:

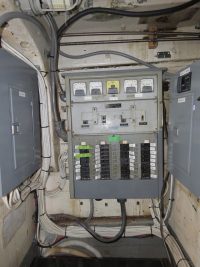
Sanded and painted the main AC panel
Cleaning the fuel tanks and polishing the fuel
Over time, sludge builds up in the bottom of the fuel tanks. In a heavy sea, this material could be sucked into the fuel lines and clog the fuel filters, resulting in an abrupt engine shutdown. We knew that the tanks had not been opened in a long time. The process is called complex. All the fuel is pumped out of the tanks into temporary holding tanks. The fuel are then opened, examined and repaired as necessary (they are 76 year old steel tanks). After that the fuel is “polished” – run through a series of filters and then pumped back into the boat. One of our tanks looked (according to the guy who climbed down into the tanks) like it had been manufactured yesterday. The other tank had small areas of corrosion that were repaired with epoxy. The entire process took most of a week to complete.

1600 gallons of fuel in holding tanks before it is polished
Light in the lazarette
Peter installed a light in the lazarette. It’s nice to be able to see what’s down there. A small but very important project. It’s not very photogenic, but it really makes a difference.

Laz light
Dimmable lights over the pilothouse table
Peter put in dimmable lights above the pilothouse table. It’s something we’ve been wanting to do, because the regular pilothouse lights are too glaring for dinner. The ambiance of the new lights is perfect. We forgot to take a photo in the evening, so this one will have to do.

Dimmable lights provide mealtime ambiance
Mounting of the USC&GS tides and currents bottle
We had procured a USC&GS currents bottle on Ebay, and needed a way to showcase it. These bottles were released from survey vessels with a note inside in several languages requesting information on where the bottle ended up. They were used to determine currents in the North Pacific. Nancy made a display shelf just for the bottle, using some scrap teak that we had.

The base

Complicated clamping for the parts of the base
Result–pretty good!

Completed display mounted on the Salon wall
Binocular holder in the salon
We wanted to have a place to keep a pair of binoculars in the salon, so we wouldn’t have to run up to the pilot house whenever we saw a bird or a marine mammal. Peter went back to the scrap teak pile, and built a holder.
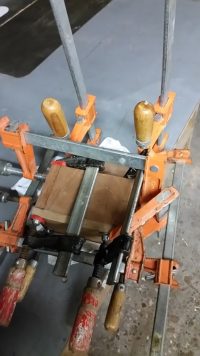
Clamping the binocular holder after gluing
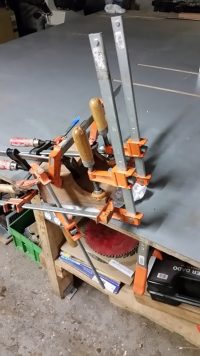
Another view of the clamp forest

After Nancy’s varnishing, the new binocular holder is a thing of beauty
Canvas work everywhere–
The Sailrite machine has been getting a workout.
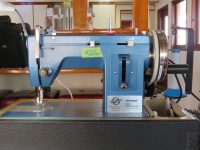
New more functional cover for the freezer
First, the chest freezer got a new cover. The first one suffered from design issues–you had to take it off to open the freezer. The freezer is right behind the stack, so the exhaust soiled the Sunbrella. The strap that we used to securely close the top fell off the top of the freezer every time you opened it, and we had to walk an obstacle course to retrieve the strap. After months of pondering new designs, I finally figured out how to make a cover that would fix the problems. The new cover is made with vinyl, stays on the freezer when you open it, and holds the strap in place. Success!

The new freezer cover
Searchlight cover–
This was a quick project–the searchlight has been out in the weather–now it has jammies.
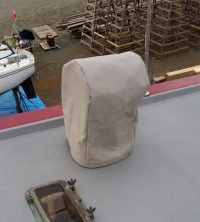
New canvas jammies on the searchlight
Canvas covers for the lightboards
These have been puzzling me–how to make canvas covers that protected the lightboards and the lights. I finally contacted Matt Grant at Sailrite, and he gave me a few great suggestions. I ended up using acrylic boards for support of the fore and aft parts of the covers, and used 3 sections of cloth to allow for the differing sizes between the two acrylic boards.

Patterning for the new covers

Covers for the lightboards–a little baggy, but very functional.
Of course, canvas on the light boards requires a reminder by the running light switches.
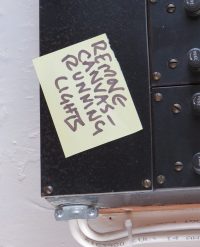
Reminder for the crew
Stateroom 1 upgrades
Stateroom 1 (the aftmost stateroom) received a number of upgrades.
New shelf next to bunk (the old one was painted formica). Once again, we went to the teak scrap pile for the fiddle.
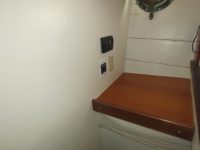
New plywood and teak shelf after varnishing
When David and Susan stayed in Stateroom 1 in August, he decided a small shelf was needed for glasses, iphones, etc. So he made one during the cruise: here’s the result!

David at work, building the new shelf

New shelf for sundries
The third modification to Stateroom 1 was the removal of a closet that had been added in front of the pantry, and boxing in of the remnants. The removal added a lotof useable space to the stateroom. We have yet to replace the storage that the closet afforded, but that’s a spring project. We’re thinking perhaps a shelf and some hooks.

Stateroom after the closet was removed
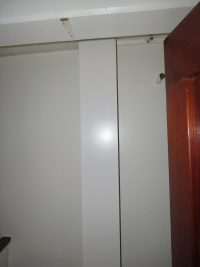
Cover over the exposed water pipes
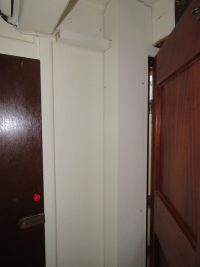
A second small wall in the stateroom
The last modification to Stateroom 1 was a permanent place for the life vests. They now live between the beams in what used to be the closet

Life preservers strapped between the beams in Stateroom 1
New passageway lights and finishing wood
Stateroom 3 got 3 updates. One technically is not in SR3, but benefits guests in that room–Peter extended the passageway lights to eliminate a dark spot right at the door of SR3. It’s hard to get a good photo of the light; this is the best I could do on short notice.

New light in the passageway
And the wood inside the forward hatch in Stateroom 3 (the most forward of the staterooms) got a few layers of sealer. Eventually we will varnish it, but it looks so much better than before.
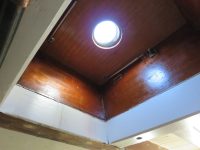
Inside of hatch in Stateroom 3
We also put a cover on an electrical outlet that faced upwards
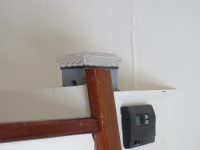
Protective cover on electrical outlet, Stateroom 3
Anchor painting
While the winch was off the boat, Nancy painted the anchor chain. We had some paint marks on the chain, but had no idea what the color scheme was. We decided that a modification of ROYGBIV would be easiest to remember. The different colors indicate how much of the anchor chain is in the water
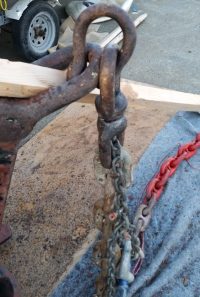
Red means the anchor is all the way up

Pantheon of colors used to paint the anchor chain
Painting the day head
Several years ago, we had painted almost every surface on the boat. The one glaring exception was the day head. It probably didn’t get done because the ceiling had previously had some glued on surface. The surface was gone, but there was flaky glue everywhere. It was an embarrassment. Finally, when we needed to replace a light fixture, we decided to repaint at the same time. Here it is–in the middle of the process.
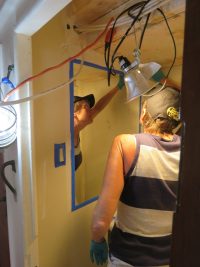
Nancy priming the day head after Peter has completed sanding
The finished project
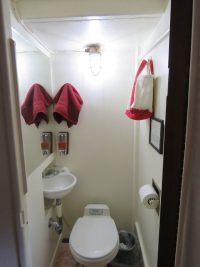
Shiny new day head
Fire retardant
We had been following the development of a fire retardant system that consisted of a metal case containing a powdered fire retardant that was released by a fuse. It seemed to be a good solution for an engine room fire–it could be thrown into the engine room from above and would extinguish a fire. The only problem was that it did not come with a mount. We ended up making one (during the Victoria trip last year), and have mounted it in the passageway near the engine room. Recently, we saw that the company was now selling a mount similar (but not as yachty) as the one we made.

Mounted fire retardant with teak base. Secured by a small line which can be easily removed form the upper cleats
Improving access to spices
There were poorly designed sliding cabinet doors over the spices that made it difficult to find what you were looking for. We finally removed the cabinet doors and hardware, added fiddles to the shelves, and made our lives much easier.
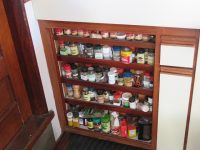
New spice storage after removal of the doors
A finishing touch to the telegraph pedestal in the pilothouse.
We had put cork in the pilothouse a few years ago. The only problem was how to trim it out around the telegraph pedestal. The obvious choice would be wood, but that would take more time than we had. We came up with a nautical solution–using line.
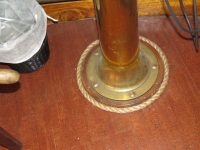
Nautical trim around the base of the old engine telegraph
We probably have forgotten some projects, but perhaps this gives you a flavor of our lives between trips and big repairs. All of these little projects ensure that our summer guests will be able to enjoy the constantly improving Gyrfalcon experience.