
For the past 12 years, we have had 5 grey painted plywood hatches along with 2 fir hatches in our stateroom. At some point, there must have been either fir hatches that got replaced, or a fir floor that was cut up for renovations and replaced with ply.

Mostly the hatches are covered up with a rug, but they poke out around the edges and they’re unsightly. They have paint splatters and are scratched and dented. I got the idea that maybe I could do faux painting that might look better than the grey.

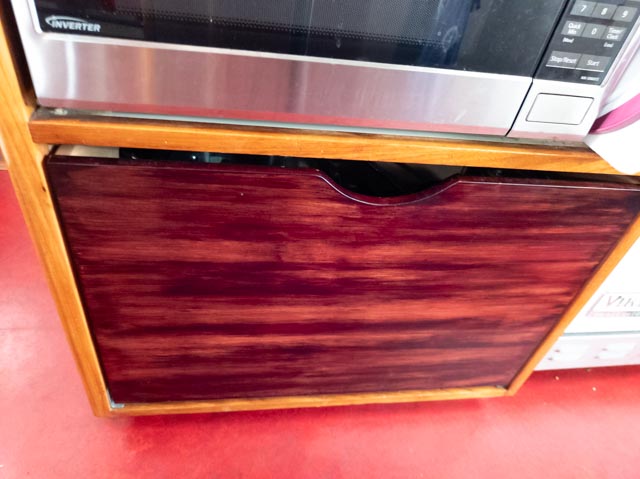
I had done only one faux painting project in my life–that was a maple drawer in our galley that I painted to match (at least in color) the teak trim.
About 20 youtube videos later, I had some ideas of how to approach this project. I knew I couldn’t match some of the incredible artists out there (check out https://youtu.be/6yviFF_Htio) but I felt that fir grain, being fairly straight and consistent, was something that I could imitate successfully. I spent a long time looking at the fir flooring in our stateroom and thinking about the videos.

First step, trying different color base paints. I did this using the little tester pots that you get at Home Depot or Lowes. When I really stared at the fir, I realized that the base color was variable, and that it was sometimes lighter in patches and in strips. The color of the wood was often different, likely sapwood vs heartwood. I also needed to figure out a way to get graining. This was harder than expected, since I could find base paints using one type of paint (e.g., latex) and then the glaze only in another, or vice versa. I finally came up with several different options, including using polyurethane varnish with art store paint added.

Here are 2 of my practice boards. I created several of these until I came up with the right combination. Ready to go! Mallory Paint matched the base colors (at the top of the board) that I came up with, and I was ready to start.


I started the following process on just one hatch, then started to do the others as a batch (this is why you see one hatch that looks finished in the photos). The problem was that my technique had improved between the first and the second set. I ended up repainting the first hatch in the end.
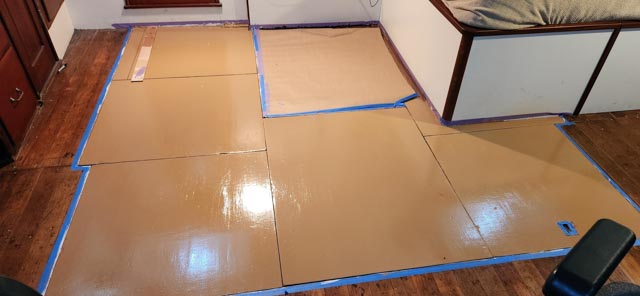
First step was scrubbing, priming, and masking the boards and surrounding area. It looks better already!

I applied the base coat of paint (the darker paint, representing heartwood), and then drew lines with a black sharpie to indicate where the seams were between adjacent boards. The hatches are small enough, so I didn’t need to create faux butt joints.
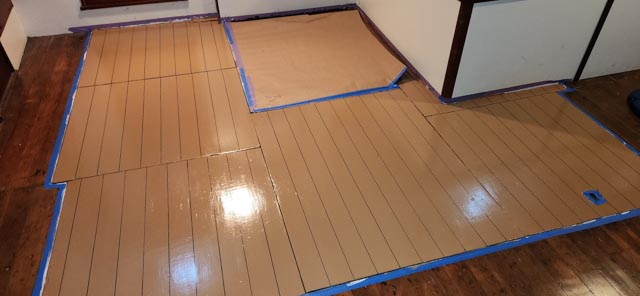
Then I painted on the sapwood. It’s hard to be purposefully random, so I just tried to imitate adjacent wood. I used masking to help me make some of stripes of different colored fir.
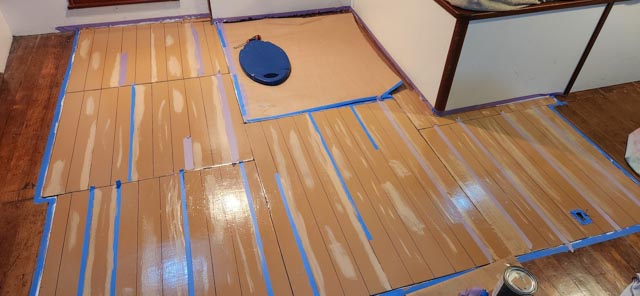
Next was graining and patina. I found that a small piece of tshirt balled up made the best grainer (better than the graining tools you can find online). Fortunately, there were gouges in the plywood and they made for instant patina. When the ply was in good shape, I tried to add random darker marks–also harder than it seems like it should be.

With just the paint and graining, there didn’t seem to be enough depth to the wood. I had some water based stain (General Stains) in 2 colors left over from the galley drawer, and used it to add some richness by rubbing it on and then rubbing it off. Next step was adding back the seams with a sharpie. I had made a story board, so it was easy to make sure they were in the right place, and I didn’t have to remeasure (not my strong suit.
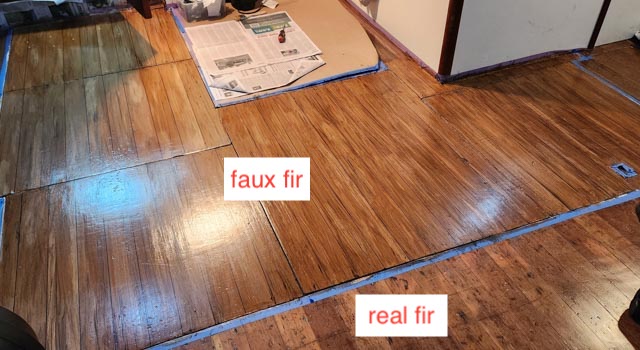
It even looks good up close, except that there’s less patina on the faux fir.

Now the artistic part: the original fir is nailed with copper nails. Over the years, there has been oxidation of the nailheads and the wood around the nailheads. The nails are varying shades of copper and the wood around them is black/grey and brown.

I found a copper paint at the local art store, and just dabbed it onto the wood—it was so easy. All I had to do for the oxidized wood was use a brush and a bit of black artist paint, and use my thumb to smear and wipe off the excess. Faux nails on the bottom, real nails on the top!

Four coats of floor polyurethane, and it’s a wrap!
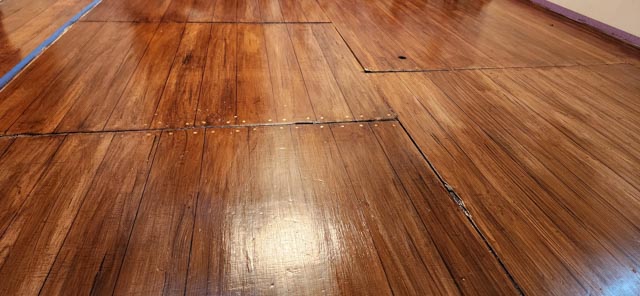
Oh wait–now the benches, painted a color that we veterinarians call calf scours brown, look awful. And how about those grey stairs that I had painted as a temporary solution about 11 years ago?

Suffice it to say, the benches needed the same faux fir treatment. While I was at it, I freshened the sides of the benches with a new coat of white paint, and pulled (hopefully) the last of the carpet staples on this boat (we pulled thousands of them when we first bought the boat).

I love one of the bench hatches–on the inside of the hatch, there is a typewritten piece of paper taped to wood saying what should be in that compartment–dating back to the 1960s or earlier.

The painting process was the same as for the floor, so i’ll just put a gallery to show you what was done.



And the steps…the stairs got new paint–red treads and white risers!
Before…

Stairs with bling!

The stateroom looks great!
Note from Peter: My part in this entire process has been to bring guests down into our stateroom and say: “You will not believe what Nancy has done – just take a look at these floors.” The end result is incredible.